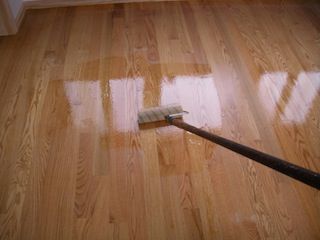
How to Refinish Hardwood Floors: A Comprehensive Guide
Refinishing hardwood floors is a rewarding and cost-effective way to breathe new life into your home’s interior. Over time, hardwood floors can become scratched, dull, and worn due to foot traffic and general wear and tear. Refinishing these floors can restore their beauty and extend their lifespan. In this guide, we will take you through the step-by-step process of how to refinish hardwood floors, providing you with tips, techniques, and insights for a successful project.
Introduction
Refinishing hardwood floors involves a series of steps designed to revitalize your floors and enhance their appearance. This guide will walk you through each stage of the process, from assessing the condition of your floors to applying the final finish.
Assessing the Condition of Your Floors
Examine the state of your hardwood flooring before you start. Find out if they require a thorough refinishing or if minor repairs will do.

Gathering the Necessary Tools and Materials
You will require equipment, such as sanders, scrapers, brushes, and safety gear, to successfully refinish hardwood floors. Also, obtain the necessary supplies, such as stains and finishes.

Preparing the Room
Clear the space of obstructions and make sure there is enough ventilation. Put protective materials over anything that can’t be moved, like built-in furniture.
Removing Furniture and Clearing the Area
Remove all the furniture and items from the space. You will have enough of room to operate effectively and unhindered as a result.

Repairing and Patching the Floor
Check the flooring for cracks or other damage. Before continuing, fill in these flaws with the proper wood filler and let it cure.

Sanding the Floors
An important procedure that removes old finish, stains, and flaws is sanding. For a smooth surface, start with coarse grit sandpaper and progressively move to finer grits.

Choosing the Right Stain
Choose a stain that goes well with the style you want. To make sure the stain matches your expectations, test it on a small, inconspicuous section of the floor.

Applying the Stain
Apply the chosen stain as directed by the manufacturer. Work in small pieces and remove any extra stain right away to get an even colour.

Applying the Finish
Apply a clear finish once the stain has dried to protect and improve the appearance of the wood. For a uniform finish, use lengthy, even strokes.

Drying and Curing
Allow the finish to dry and cure according to the product’s recommendations. This is essential for achieving a durable and long-lasting result.

Adding Additional Coats (Optional)
For more protection and shine depth, add extra coats of finish as required. Before applying the next coat, be sure the previous one has completely dried.
how to strip and wax floors without a machine
Buffing and Polishing
Between applications, lightly polish the floor with a buffing machine or fine sandpaper. This procedure removes blemishes and gets the surface ready for the last coat.
Final Touches and Room Reassembly
Reinstall furniture and accessories cautiously once the final coat has dried. To avoid damaging the freshly refinished floor, place felt pads under furniture legs.
Maintenance and Care
Sweep, dust, and clean your refinished floors frequently with the right hardwood floor cleaners to preserve their beauty. Use rugs in high-traffic areas and stay away from excessive dampness.
How long does it take to refinish hardwood floors
The time it takes to refinish hardwood floors can vary based on several factors, including the size of the area, the condition of the floors, the specific refinishing process used, and the number of coats of finish applied. On average, though, here’s a general breakdown of the time involved:
- Preparation: This involves moving furniture, removing carpets or rugs, and thoroughly cleaning the floor. Depending on the size of the area, preparation can take anywhere from a few hours to a day.
- Sanding: Sanding is a crucial step to remove old finish and create a smooth surface for refinishing. This can take a considerable amount of time, especially if multiple passes with different grits of sandpaper are needed to achieve the desired result. Sanding can take anywhere from 1 to 3 days, depending on the condition of the floor.
- Staining (if applicable): If you plan to change the color of the wood by applying a stain, this step will add extra time. Staining might require another day or so, depending on the drying time and the number of coats applied.
- Applying Finish: Applying the finish (polyurethane, for example) usually involves multiple coats. Each coat needs to dry before applying the next, and drying times can vary depending on humidity and temperature. This process can take 2 to 3 days, with each coat taking a few hours to dry.
- Curing: After the final coat of finish is applied, the floor will need time to fully cure and harden. This can take around 1 to 2 weeks, during which time it’s important to avoid heavy traffic and moving furniture back in.
Overall, the entire refinishing process can range from a week to a couple of weeks, but it’s important to account for factors such as the type of finish used, drying times, and the intricacies of the project. It’s recommended to consult with a professional or follow the manufacturer’s recommendations for the specific products you’re using to get a more accurate estimate for your situation.
Conclusion
Refinishing hardwood floors is a transformative process that can rejuvenate the interior of your home. By following this comprehensive guide, you can achieve professional-quality results and enjoy the beauty of your refinished hardwood floors for years to come.
Need professional Hardwood floor refinishing
Looking to revitalize your hardwood floor refinishing in Tampa? Look no further! Discover the expertise and quality service offered by ArrivalServ for all your hardwood floor refinishing needs. Transform your space with their professional touch. Get a quote today and experience the beauty of refinished hardwood floors like never before!


